Intro to the Nord Stage 2
A high level look at one of Nord’s flagship keyboards
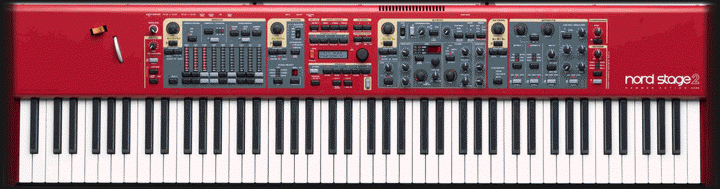
You’ve probably noticed that many churches, bands, and even live TV shows have a signature red keyboard on stage. These red keyboards come from Nord. There is a reason for the popularity of this brand, and even more so for its previous flagship board the Nord Stage 2 (since replaced by the Nord Stage 2 EX and Nord Stage 3). These keyboards are designed by keyboardists for keyboardists, and are handmade in Sweden with live controls and sound changes available instantly at your fingertips…no programming required!
So, why am I writing about and introducing a keyboard that is several years old with newer models available? Because this is one of the boards I personally have the most experience with, it’s still extremely popular, is found in many churches, and is coming into more affordable price ranges for hobbyists as well. The Nord Stage 2 also can recreate the majority of sounds I mentioned in this post.
-
Before I continue, I think it’s important to note that I am not affiliated with Nord in any way at this time nor do I represent them. This post is comprised of my thoughts and opinions only. This post will be part of a small grouping of posts dedicated to the Nord Stage 2 and its commonly used features and problems.
-
Intro
To start, I would consider the Nord Stage 2 more of an advanced synth or possibly an arranger due to its capabilities. For more on keyboard types see this post. It comes in 3 models with varying keybed sizes and styles with the HA88 having the full 88 keys that feel very authentic. It has 3 sound engines which is what this instrument is designed around. Here are some other (but not all-inclusive) interesting stats:
| 41 pounds | 50 inches long | 3 sound engines |
| 400 programs | 5 live buffers | 2 live slots |
| 3 split zones | MIDI controls | 40-60 voice polyphony |
| 4 audio outputs | Multiple effects | Aftertouch |
| Pitch Stick | Mod Wheel | Swell and rotary pedals |
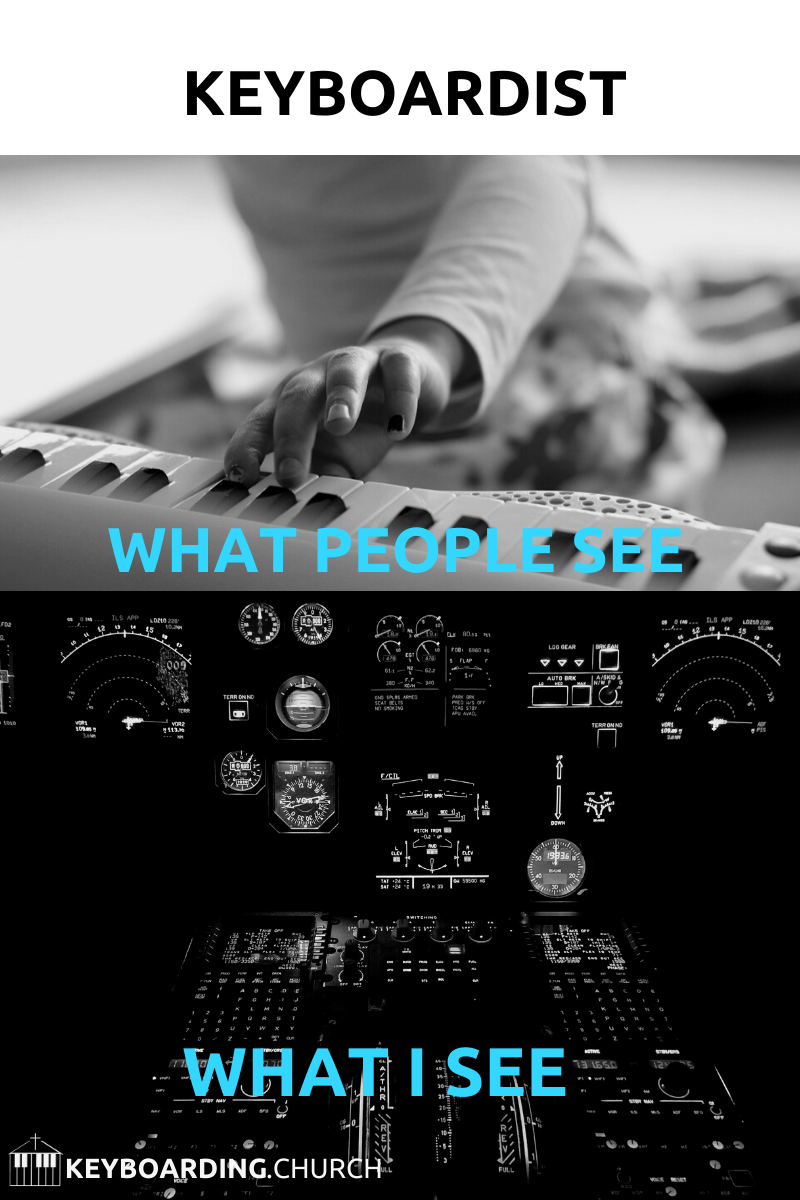
That is great, but how can I as a piano player understand a keyboard that looks like an airline cockpit!? This is where the Nord Stage 2 shines! While it looks intimidating at first it really is broken into 3 sections with all of the controls you want (or want to leave alone) at your fingertips.
You don’t need to program anything or dig through complex menus or even read the manual to get started playing. Let me break it down for you in the following sections and simplify things so you can feel confident when playing on this keyboard.
Organ Section
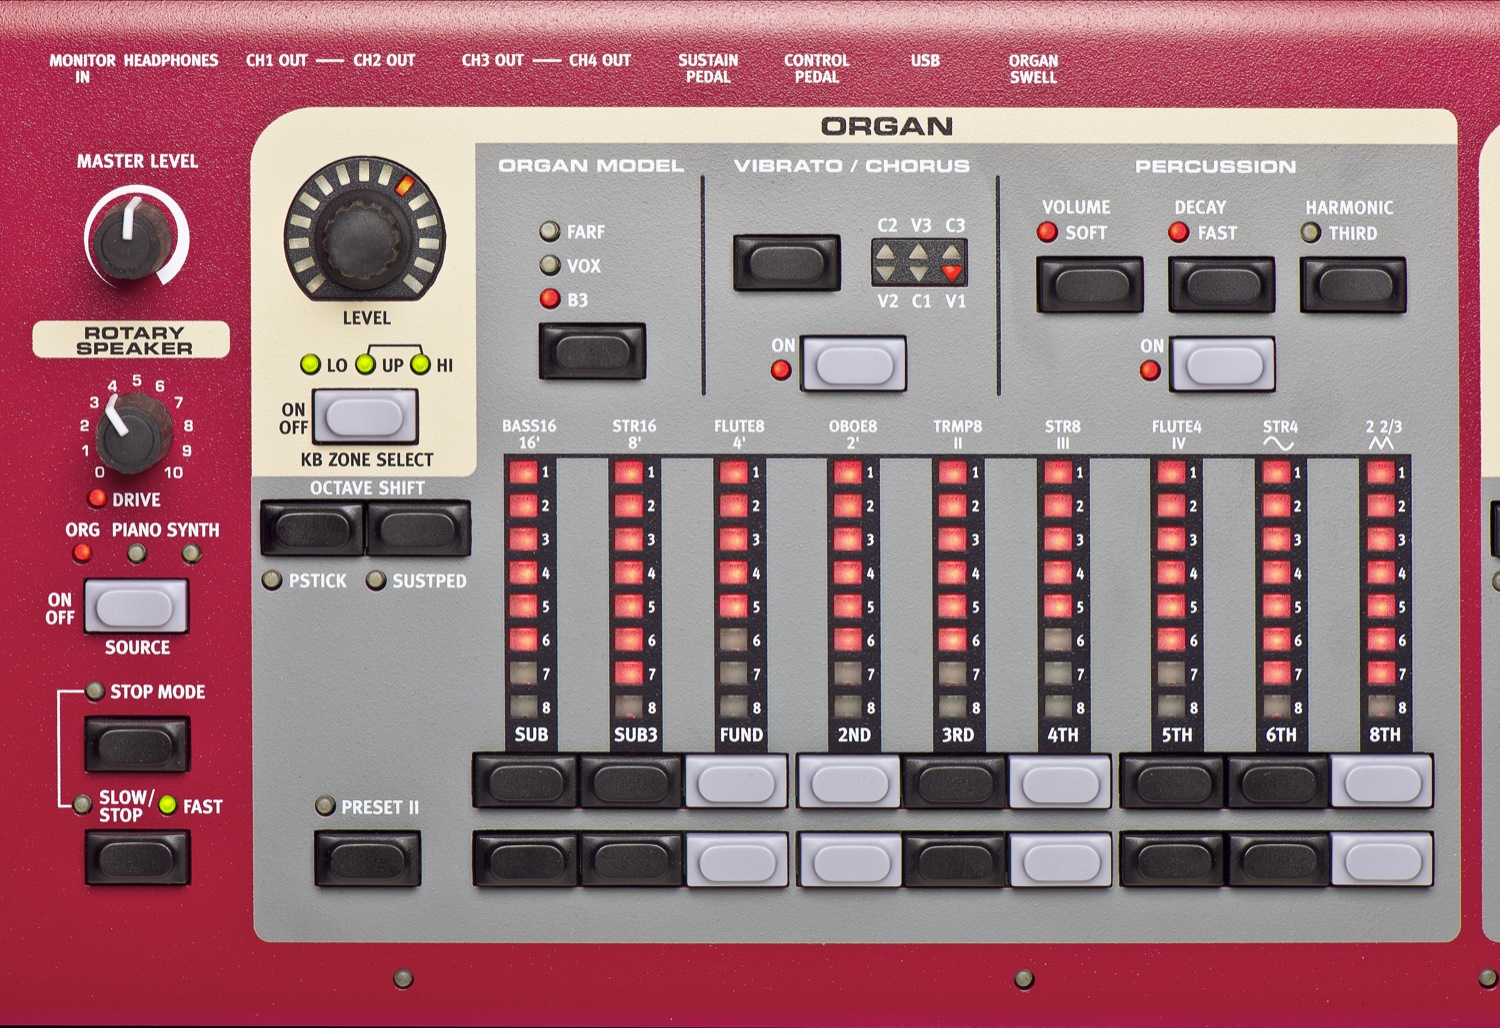
Other than the pitch bend stick and mod wheel, the keyboard begins with the organ section on the left. What is NOT a part of this section is the “Master Level” knob. This knob controls the volume of the entire keyboard, not just the organ section. Directly below that is the Rotary section. This can apply to the entire keyboard, but it applies to one section at a time indicated by the “ORG PIANO SYNTH” lights. This does a great job at modeling rotary speakers and giving it that Leslie sound.
The actual organ section begins in the upper left of its outline with the section’s “Level” (volume) knob. the volume is controllable only if the section is enabled as indicated by the on/off button below it. Once it is enabled you can select between a Farfisa, Vox, or Hammond B3 modeling engine complete with vibrato/chorus and percussion options. The light bars below that control and indicate the drawbars.
Recommendations for this section include watching the section level (volume) as it can vary wildly and have big contrasts against other sections. The preset button is also vary useful for quick changes between drawbar settings as the buttons are not as responsive as a live analog organ.
If any or all of this sounds new to you then I recommend starting simple. Check out the way the engine responds to the different options and setting adjustments. Do a little research on terms you don’t know. Even if you had some prior experience on a Hammond as I did before the Nord, it can still be a little daunting when stepping up to something new. If this is all completely new then maybe starting with the piano section is an easier fit.
Piano Section
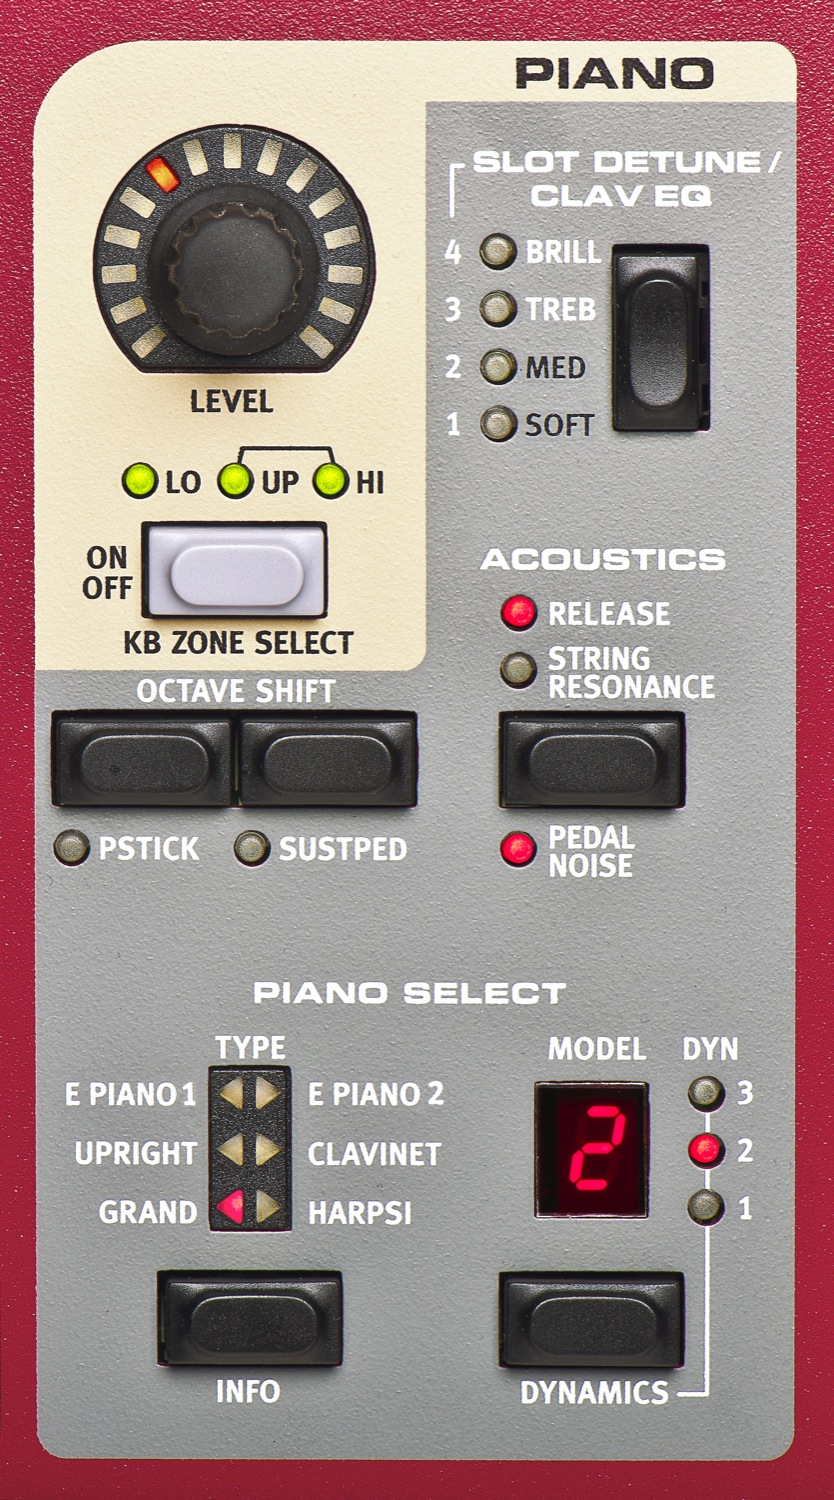
Moving to the right the next section is dedicated to the piano engine. This is home base for us classically trained pianists! As with all 3 sections, it starts at the top with its individual “Level” button and the on/off button below that.
At the bottom of this column is the piano select buttons. You can select between multiple piano, electric piano, clavinet, and harpsicord types. Within each type section there may also be multiple models available. The detune/EQ buttons back at the top add some effect and customization. The acoustics button enhances the realism. For solo piano pieces this is immensely effective.
Synth Section
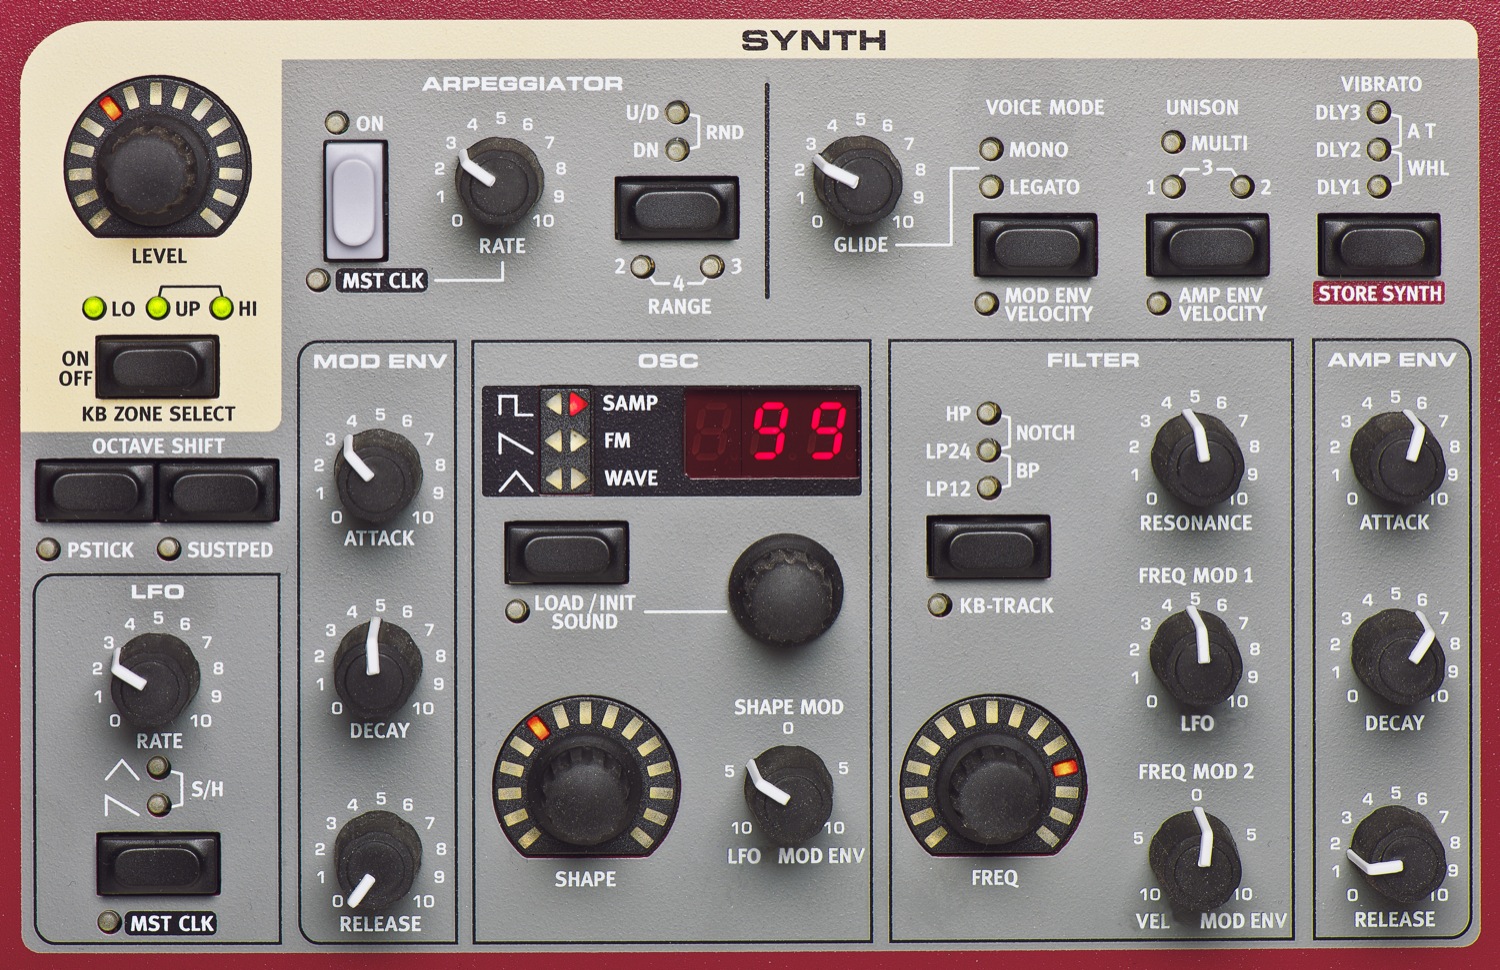
The next section to the right is the program section, but let’s skip that for now and proceed to the next sound engine section. This is the 3rd and last engine section that you’ll need to focus on. It is inherently more complex than the other sections and will require more time to understand.
To break it down and start as simply as you can begin with the level and on/off buttons again. Once you’ve done that, hop over to the “OSC” section. This is where you select your oscillator type. You can jump right into your traditional SAW, SIN, and SQUARE wave patterns and modifying their LFOs and doing filter sweeps. Or, my preference, start by hitting the “Load/Init” button until the indicator light lands on “SAMP.”
The “SAMP” type loads the sample bank with preloaded sounds and configurations in memory. These sounds include pads, brass, strings, lead synth sounds and more. The knob tied to the “load/init” button changes the selection, the number is displayed in the panel, and the sample name is displayed in the main LCD screen.
Everything else you see in this section manipulates the sound. The majority of these options will require some basic level understanding of synthesizers and their waveforms. All that’s needed at this point is to know that the Nord Stage 2 can “hold its own” as a synthesizer and can produce some amazing sounds.
That does it for the 3 primary sound engine sections. If you learn how to enable/disable these sections and get the sound you need then you are well on your way to understanding the Stage 2. I recommend stopping here and practicing with these sections if you have a Stage 2 available. If you are already comfortable with these sections or feel you have a good understanding then go ahead and proceed.
Effects Section
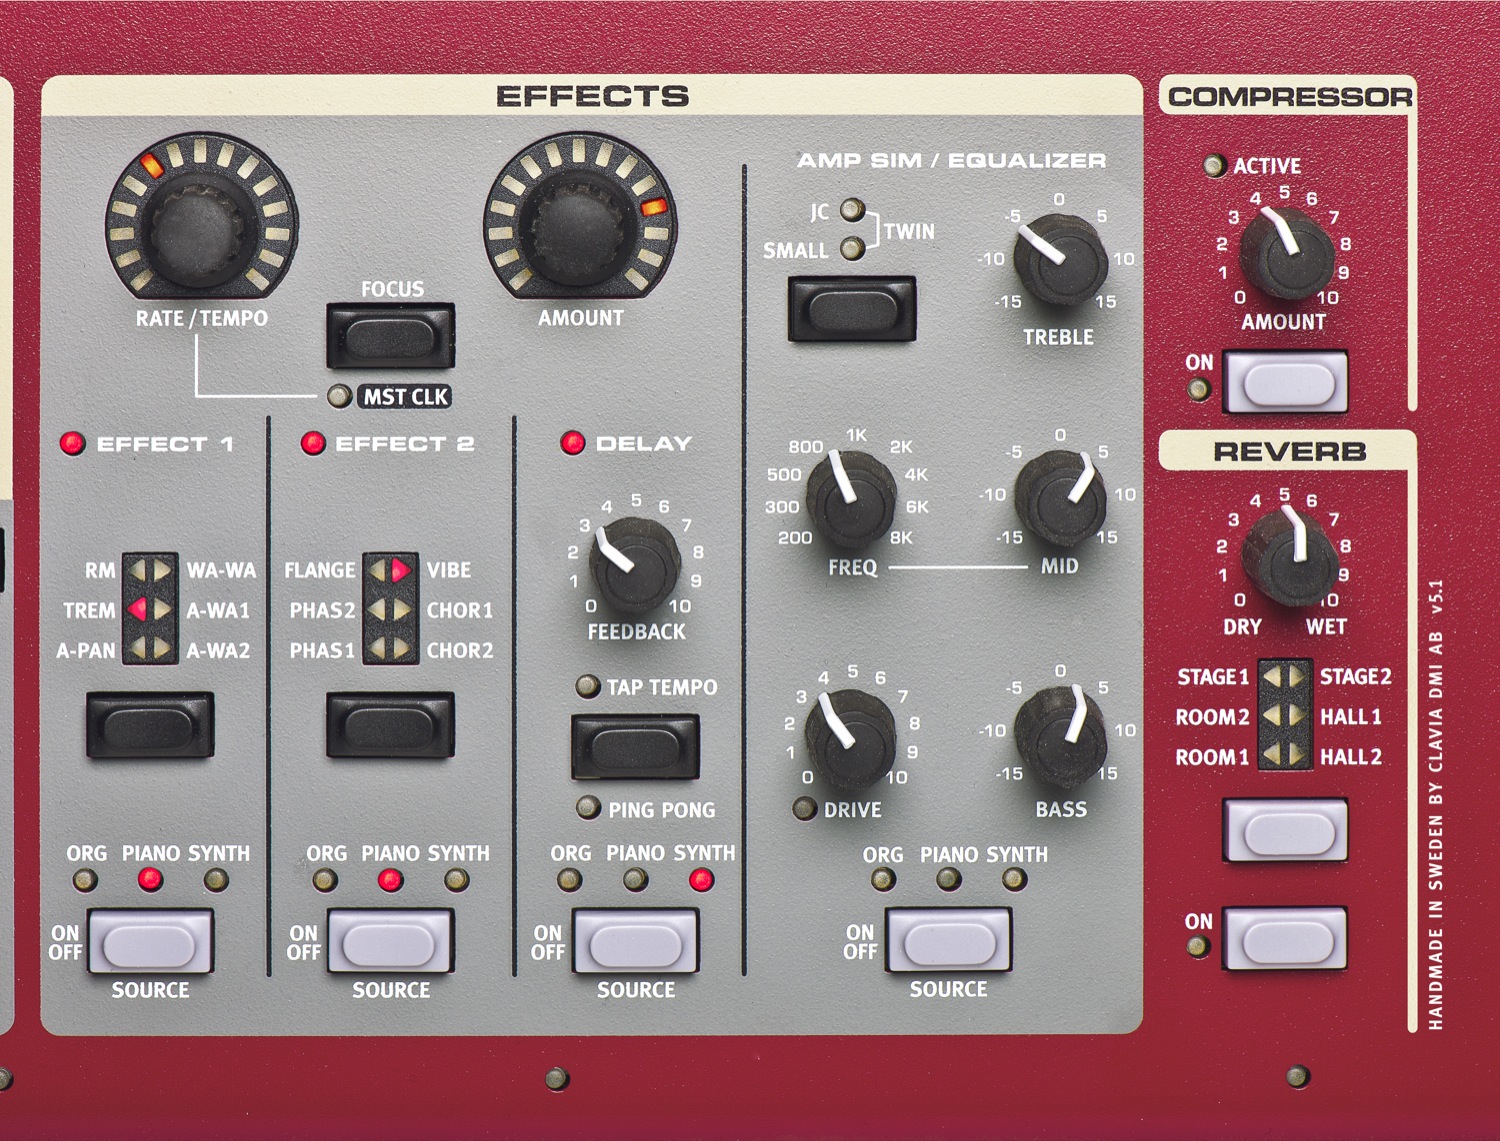
Skipping again to the effects section you’ll notice the same on/off buttons at the bottom of each of the 3 possible effect columns. Each effect column is appliable to one sound engine each with multiple effects being able to attach to a single section. Again, the best way to understand these is to play around with them.
A couple of things to pay attention to come from the delay and compressor sections. The delay can have its own tempo tapped in or can be attached to the master click. The compressor and reverb section applies to the entire keyboard.
External MIDI Section
Between the Synth and Effects section is the External MIDI section. This is only used when connecting to other MIDI device. As such it is not directly relevant to a high level understanding of the Stage 2, but it is good to know the capability exists to control or be controlled by other MIDI devices.
Program Section
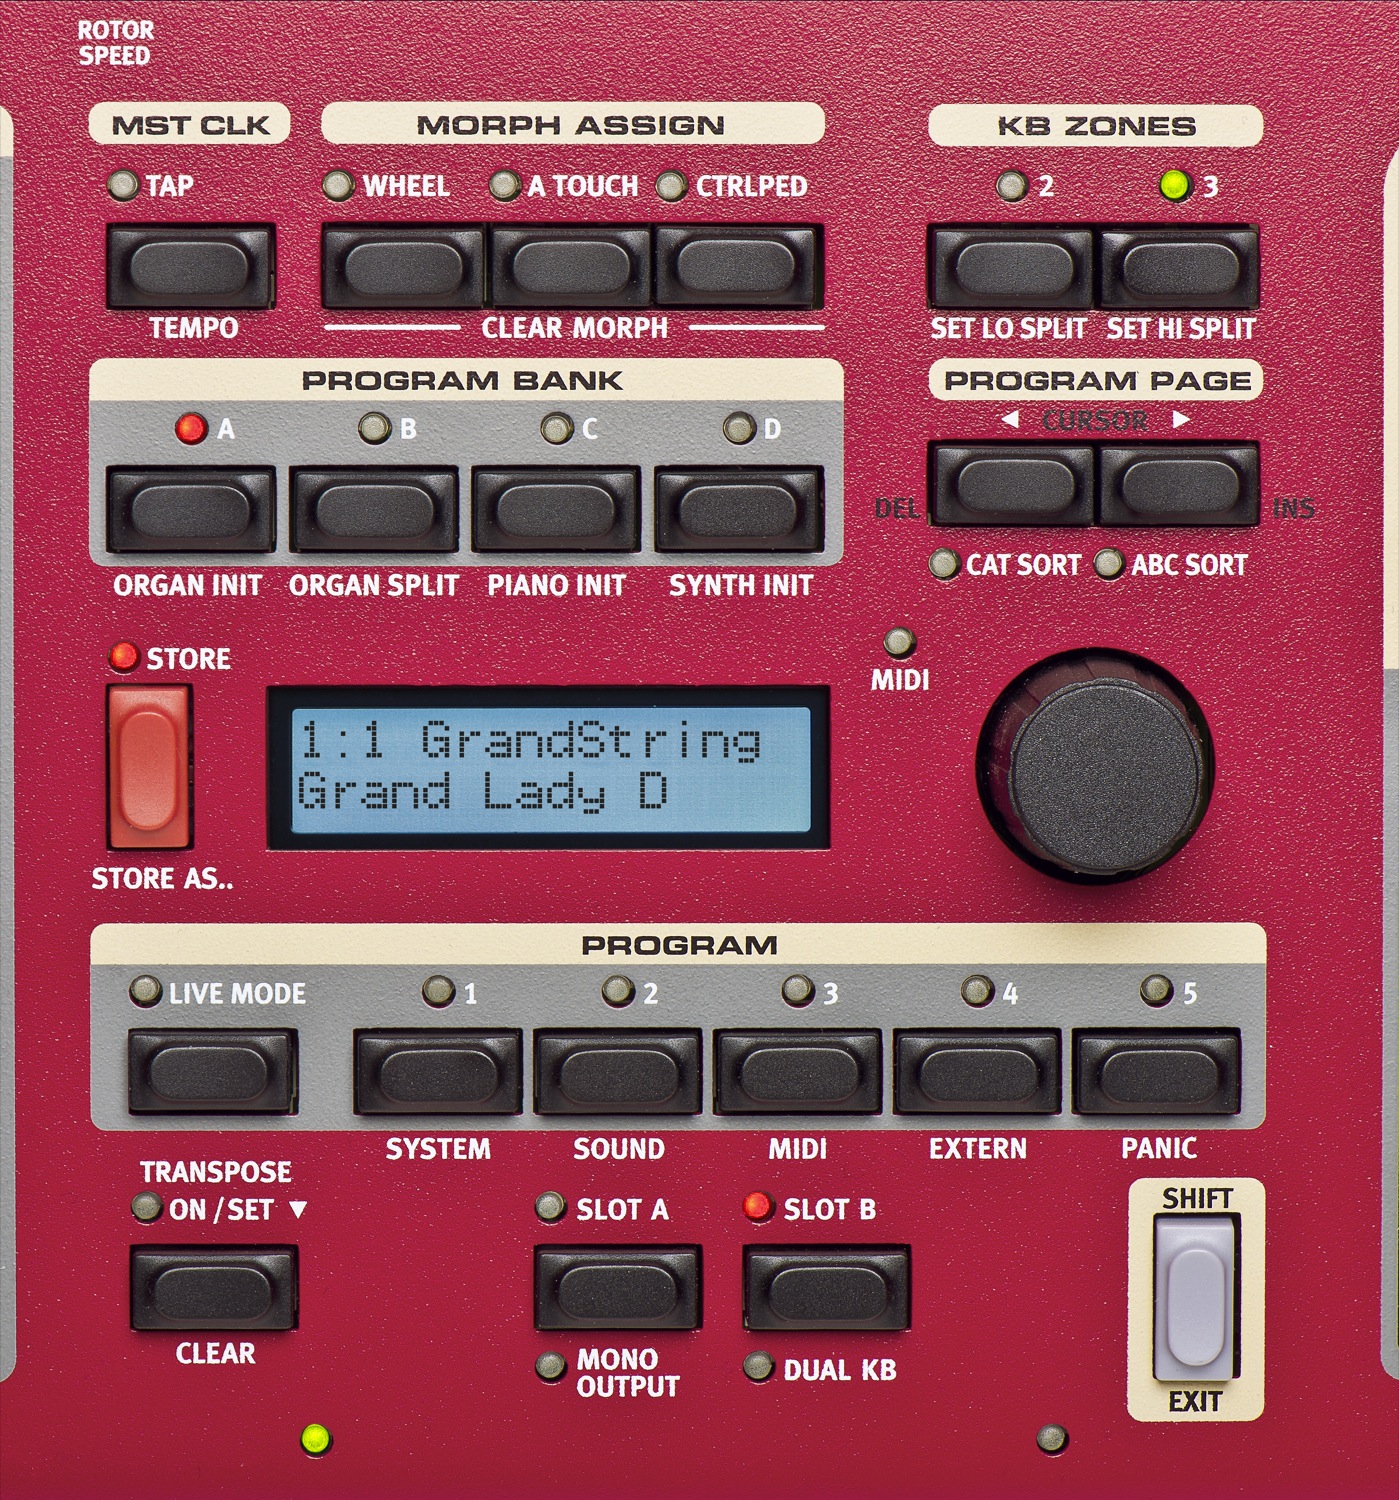
Last but not least is the Program section in the middle of the keyboard. This section includes the brains of the board, global settings and saved programs, and will control your preprogrammed and live playing. It is worth taking a look at the manual for this one if you have some time.
Stepping through this section starting in the upper-left, you’ll see the Master Click button which controls the tempo for the entire board. That proceeds to the Morph Assign area that attaches the pitch stick, mod wheel, or aftertouch to specified effects or controls. Then comes the Keyboard Zones buttons which identifies where on the keybed splits will occur.
Below those 3 areas is the Program Bank. This is where you’ll find pre-programmed patches and sounds. Banks A-C are the factory presets. Bank D is reserved for the user to save programs. If you are looking for a little inspiration or are wanting to explore more capabilities of the board then this area is for you!
Under the LCD screen is Live Mode and Programs. When live mode is off you are playing with programs saved to memory. When live mode is on then you can make changes and tweak the 5 available programs in real-time and your changes will be saved in real-time. The slot buttons below will let you assign two different programs to a program slot with seamless sound transition between the sounds.
And the button sent straight from heaven for classical pianists is the transpose button which will transpose keys automatically for you as you play. Some might consider this cheating, but in a live setting with audibles called and other variables in play sometimes we need every advantage we can get! Unfortunately, the placement of this button also leads to unwanted transpositions. Please be mindful of this and always double-check that light!
Next Steps
This post just scratches the surface, but I hope it has helped you break it down a bit more into manageable pieces. Just focus on a section at a time and try something new each time you step up to the Stage 2. I recommend getting behind the keyboard as soon as you can and try applying one or two things you learned from this then building on that foundation.
- I also recommend you check out the Nord Sound Libraries to update your board with some great sounds.
- Join a facebook group or two dedicated to the Nord such as “ Nord Keyboard Users.”
- Then come back here and check out the next two posts that discuss Nord Stage 2 commonly used features and common problems/troubleshooting.
Chris Sereno
Creator of keyboarding.church
I have been playing piano for almost 30 years and have 20 years behind keyboards. I was classically trained through high school and have continued learning through various alternative methods. I have also always loved technology, so I merged my passions and applied the combined skills into keyboarding. The majority of my playing has been dedicated to the church, and my wife (vocals) and I are currently serving at Northwoods Community Church. I created this site to share my knowledge and experience, equip others, and foster community among church pianists/keyboardists. More about me…