14 Commonly Used Features of the Nord Stage 2
Get the most benefit from your Nord right out of the box
When being introduced to a new keyboard the amount of buttons, knobs, menus, accessories, sounds, and software can be overwhelming. If you haven’t started with the Nord Stage 2 yet then I would start with this post. The experienced and brave among us will dive straight in like a kid on a new playground. The more patient and studious will take in the new keyboard smell while reading the manual cover to cover with a highlighter in hand. The rest will watch YouTube videos and read blog posts to find new features highlighted by those who have gone before them (this is you in case you are wondering). The features below are the ones I personally most commonly use and feel other users will find the most beneficial from the start.
Table of Contents
1. Live Mode
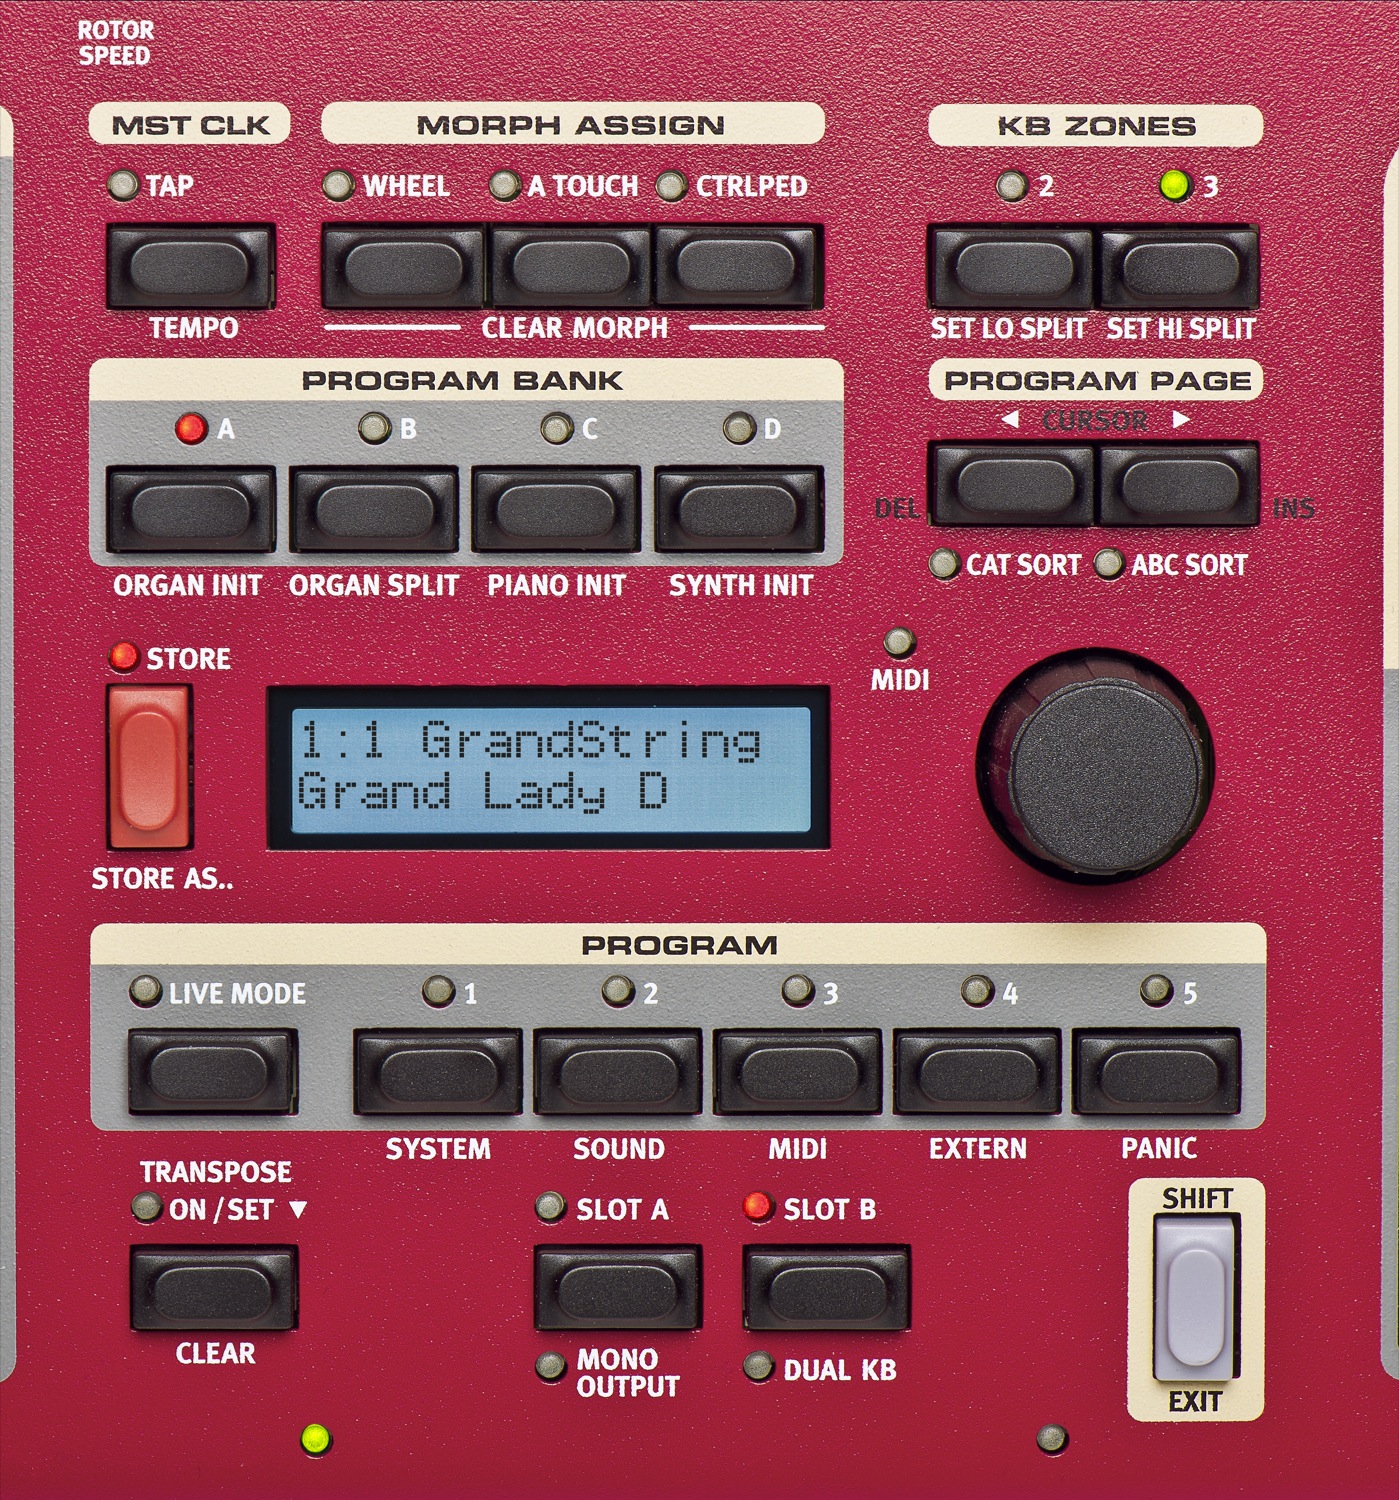
This is centrally located for a reason. It is what makes live playing so effortless. Just hit the button to activate the light and you will engage 5 program slots for live playing. Every setting you adjust from then on is saved instantly and automatically without overwriting any default stock sounds or settings. You literally can’t mess up anything on the keyboard itself!
5 slots means you can save 5 different combinations of settings and sounds. You can pull in a program from one of the memory banks or create your programs live. Once you have everything set you can instantly change your entire configuration at the push of a button! Start your set with a little classical piano then jump to an electric piano with a lush pad behind it before power sliding into a B3 organ sound and finishing off with a face-melting synth solo!
Without these slots the Stage 2 is more like a single dedicated instrument, which would then lead to a stage full of keyboards. You would either use it as a single-purpose board or be pushing so many buttons the whole time it will look like you’re playing a game of whack-a-mole. Seriously, it’s worth figuring out how to use these.
2. Program Slots A and B
Taking the Live Programs a step further are Slots A and B just below the 5 program buttons. These allow for 2 slots per program effectively allowing for 10 live programs! Why would you want to use these if you don’t need 10 programs though?
- Both slots can be applied at the same time allowing for 2 synth sounds, 2 piano sounds, and/or 2 organ sounds at the same time. This instantly turns 1 Nord into 2 creating customized and massive sounds! Just press both at once to activate. Press them again to return to one slot.
- Seamless Transitions lets you continue similar sounds from one slot to the other without interruption. The program slots stop all sounds when changing, so when needing to change seamlessly slots A and B are the way to go.
3. Splits and Layers
Most keyboards and apps now allow for layering and splits and the Stage 2 is no exception. Splits divide the keyboard into sections allowing different sounds to be assigned to different parts of the keyboard. Layering applies 2 or more sounds to the keyboard at the same time.
Splits
One way I commonly use splits is to assign a pad to my left hand and piano in the right. The lights between the keys and the controls panels indicate where the splits are set. To use splits perform the following:
- Press and hold the Shift button.
- Press the Set Lo/Hi Split buttons in the “KB ZONES” section above the value dial until the indicator lights just above the keys mark where you want the split.
- Without pressing shift now, press the ‘2’ or ‘3’ KB ZONES button to split the keyboard into 2 or 3 zones.
- Hold Shift and press the KB Zone Select button in the section you want (i.e. Piano) until “Lo” or “UP-HI” is selected and the other layers are off.
- (Optional) Use the octave shift buttons to shift the layered sound up or down octaves to get things in the range you would like.
Layers
I use layers a lot to play piano and pads at the same time. I also sometimes blend in a little organ, or use the A and B slots to layer 2 different pianos or synth/pad sounds.
To apply layers simply turn on multiple sounds at the same time and adjust to the desired levels.
If you’d like more of a walk through on layering, I found a great video posted by Worship Artistry on their YouTube channel.
4. Transpose button
At the bottom of this section just above the keys is the Transpose button. It makes key changes on-the-fly a breeze. The problem is you might find yourself hitting this button accidentally every now and then. Be aware of this if you don’t seem to be playing in the same key as everyone else!
- Push and hold the transpose button
- Use the selector knob to shift up/down by semitones.
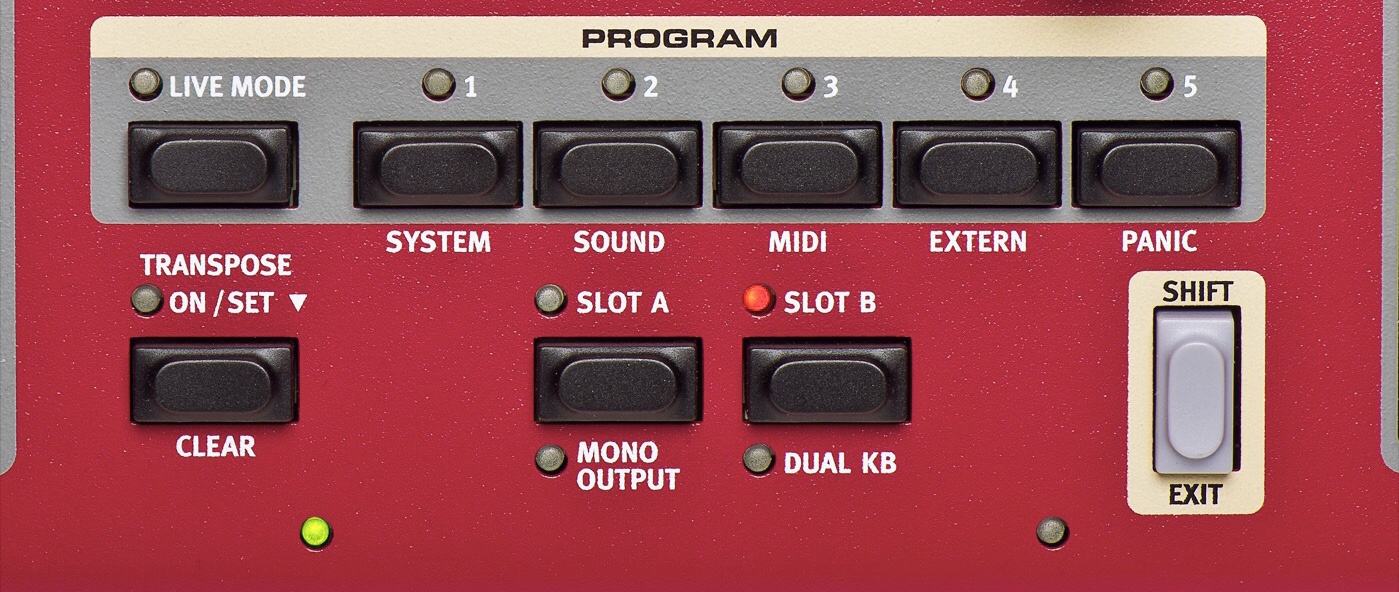
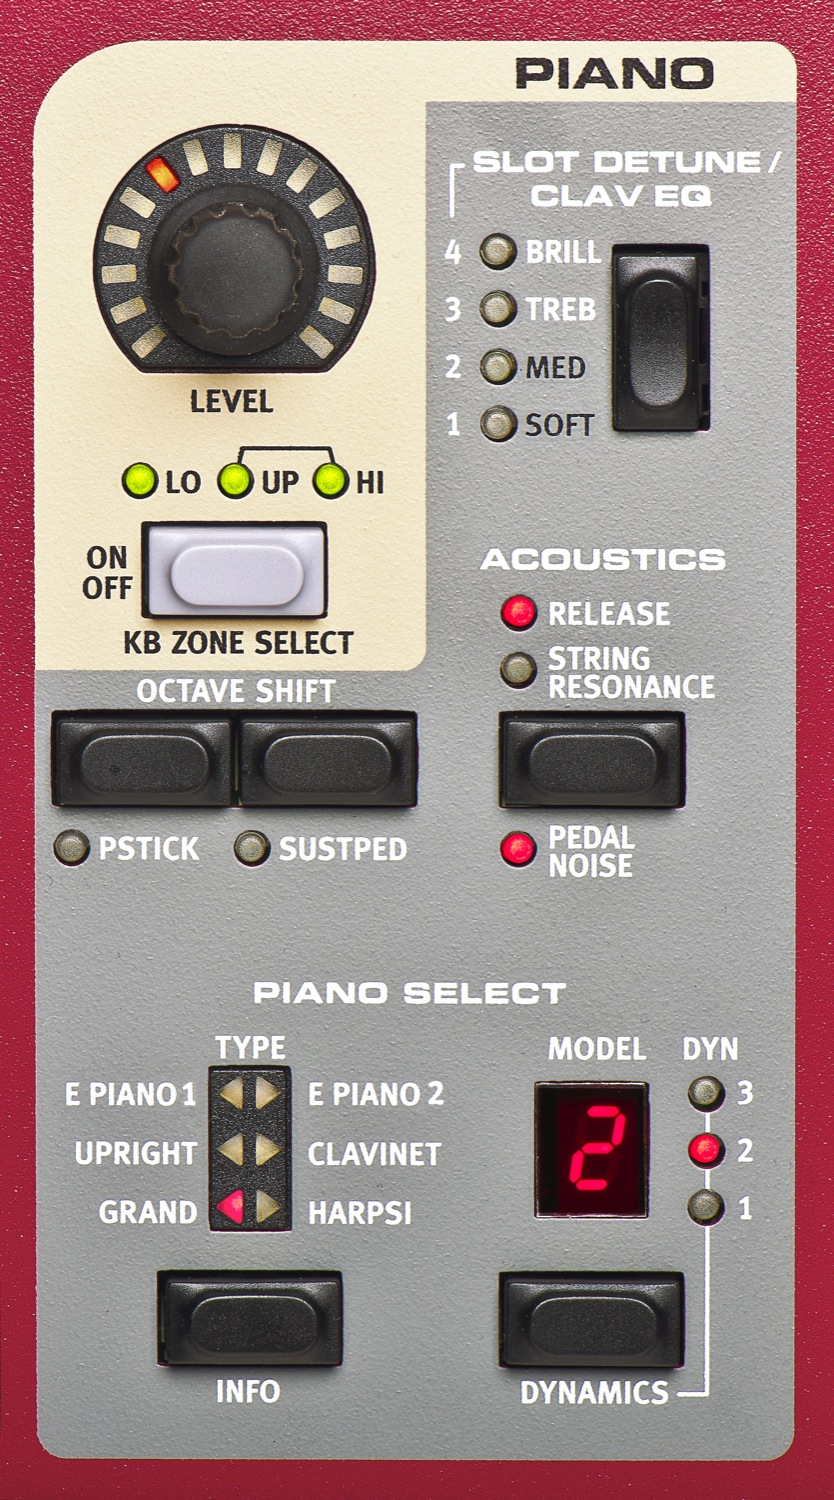
5. Organ Presets
Shifting left over to the organ section there is the Preset II button. When you need to quickly switch from 1 organ sound to another this is how to do it. Perhaps the verses of a song call for a warm low organ and the chorus features a high-end B3 solo. If you’d like a quick refresher on organ sounds, you can find that here.
The drawbar buttons are great, but a little slower than physical levers. This switch makes up for that difference. Just turn it on and off and set the patch. Settings are saved automatically.
6. Rotary Speaker
The Rotary Speaker section on the left under the Master Level knob is what provides the effects of the traditional Leslie cabinet. While this can be applied to the other sections it’s primary purpose is for the organ. This definitely adds a layer of realism and gives players a more authentic feel.
Control the fast and slow speed of the rotary using the button, or go into the menus and select a pedal to control it. I have even seen people add a toggle switch to the front of the Nord just like a real organ would have.
7. Swell Pedal
Not all useful features are part of the keyboard sections at all. One “must have” item for the Stage 2 is a swell pedal for the organ. Plug it into the designated input on the back and then use the pedal to control the organ swell. Once again, this adds to the authentic feel and sound of organs.
8. Set keys to high position for organ
This one is more of a bonus tip then an actual commonly used feature. Organs are very much like synths in that their “volume” is at a set limit and does not change or respond to varying levels of pressure or sensitivity on the keys. They are not touch sensitive! Players also run solos on organs like synths and do plenty of smashes and slides.
To make all of this easier, I highly recommend setting the sound to start at the top of the key press mimicking an actual organ versus waiting for the key to reach the bottom. It’s a small change that can have a big effect on playability.
- Hold Shift and press the Program 1/System button to access the System menu.
- Use the Page 3 and 4 (arrow) buttons to flip through the menu.
- Go to the Organ Keyboard Trig Point
- Use the dial knob to select “High” instead of the default “Low”
- Press Exit (Shift) to exit the menu and save the selection.
9. Morph Wheel
Purpose

The Morph allows you to control several parameters at once with one source. This can be used to fade sounds in/out by adjusting their volumes. You can even fade one sound in WHILE fading the other out (like a piano and pad). It can also be used to apply effects, such as ‘wah’ to the pads. You can use a foot pedal, wheel, or “aftertouch” to control different parameters or effects.
Set the Morph
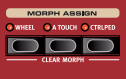
You activate a Morph by holding one of the Morph Assign buttons and at the same time operate a parameter knob in the desired direction. The setting of the parameter in the program is the “first” setting, and then you turn the knob to the second setting, which will be the maximum setting that can be set with the Morph source.
You can double-tap a morph button to assign multiple parameters. One Morph Source can control several parameters at the same time. Morphs can also influence parameters in both positive and negative directions.
Clearing a Morph
Hold Shift and press a Morph Assign button to clear all Morphs for this source. To clear a particular assignment, hold the Morph Assign button and operate the control to remove the “gap” between the programmed setting and the Morph setting.
10. Octave Shift
When you need a sound shifted up or down an octave then these are the buttons you want to find. This is especially useful when applying splits. The octave shift buttons are available in each section below the volume knob and KB ZONE buttons. The screen will indicate if you are at the default or up/down 1 or 2 octaves.
11. Filter Frequency
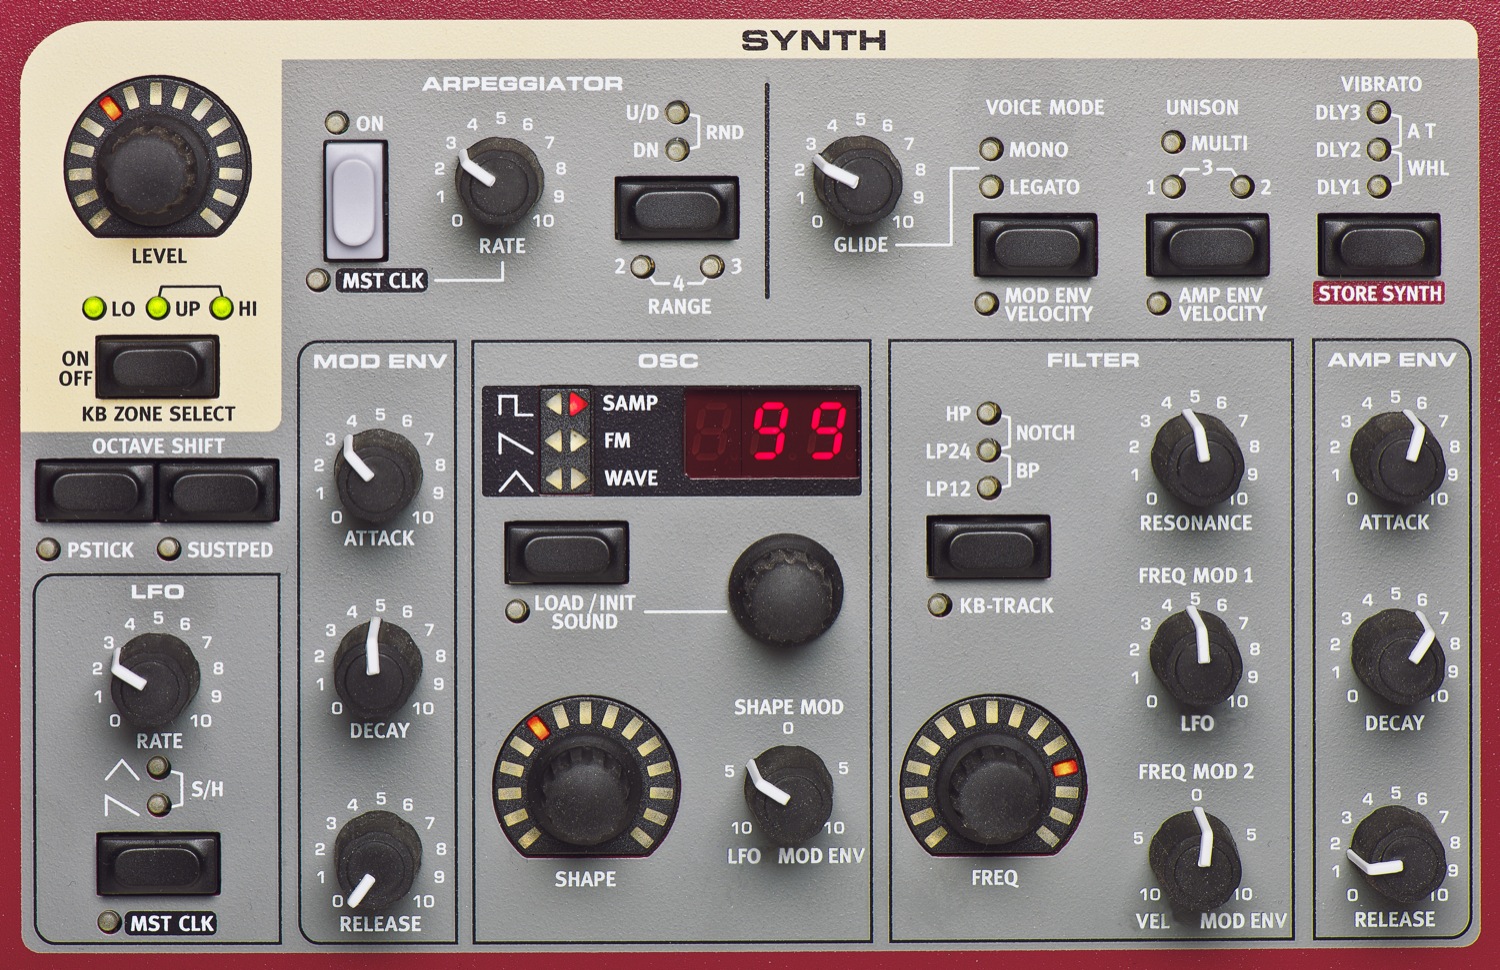
The most used synth knob I use is the frequency (FREQ) knob in bottom-left of the filter area in the synth section. This allows you to “sweep” a pad or synth sound taking it from light and airy to heavier and more distorted and back again. Apply the wheel to this effect (or even combined with others) to add some movement and add interest to otherwise monotonous parts!
12. Delay Effect
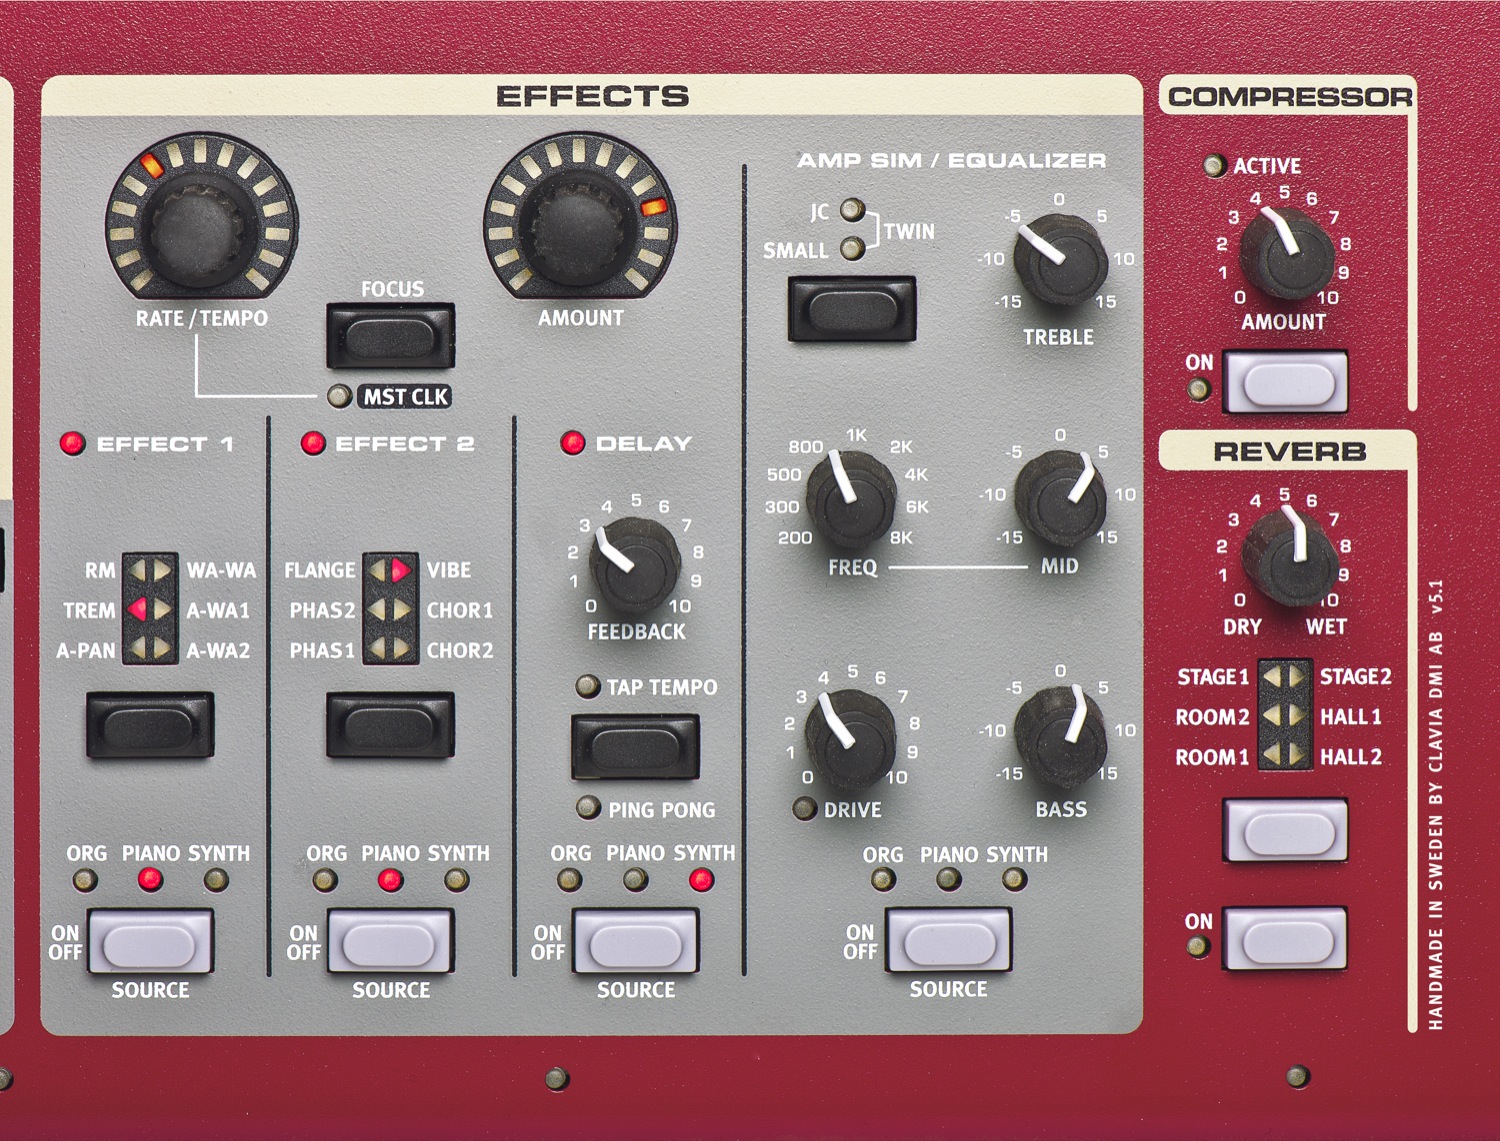
Over in the effects section, the first thing you should try is the delay. This will create an echo effect that repeats the notes you play at a specified beat and strength.
- Find the delay area and tap the ON/OFF button at the bottom.
- Double-tap it or use shift+on/off to move the indicator light to the section you want to add delay to.
- Just above that, tap in your tempo. Or use the Rate/Tempo knob at the top. You can also lock this in to the master track of the keyboard, but that’s more advanced than this post will get.
- Use the feedback knob to roughly pick how many times you want the note repeated.
- The Amount knob at the top will then determine the strength of the delay and how fast or slow it fades.
13. Reverb
Moving to the right to the end of the keyboard you’ll notice the Reverb section. This pairs nicely with the delay effect previously mentioned.
- Tap the On/Off button
- Use the selector button to select the type of reverb effect you’d like
- Turn the dial to select how dry (no reverb) or wet (very echo-y and distant) you want it.
14. Assign Sections to Different Outputs
The Nord Stage 2 has four audio outputs as shown here:
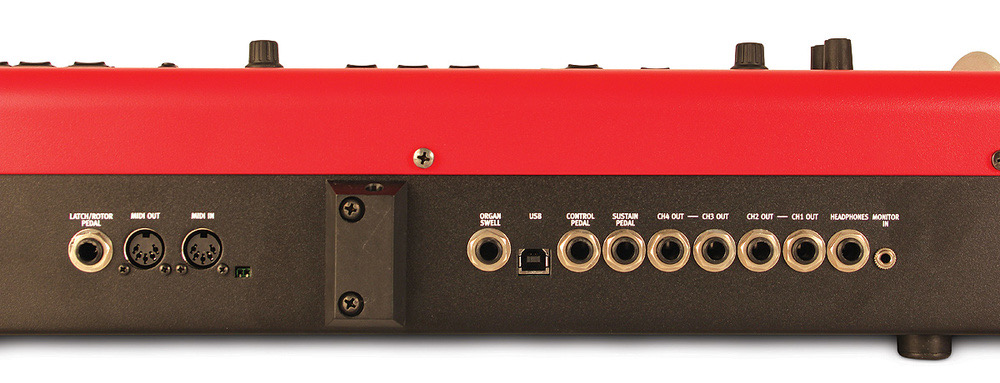
You can send the various sections (synth engines) of the Stage 2 to the different outputs. This allows for more control over the mix and EQ at your output whether it be a recording bus, personal monitor, or live sound board.
It’s a rather simple process.
- Shift -> System
- Use Program Page buttons to select Synth Outputs
- Use the Scroll Wheel to change to the desired output
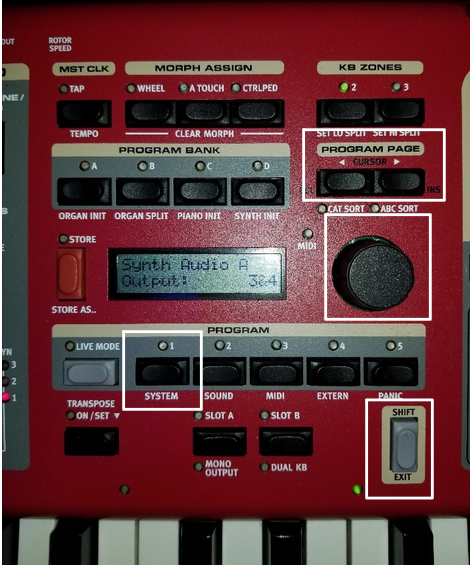
Change Outputs on Nord Stage 2
These commonly used features are at the surface of what the Stage 2 is capable of doing. Understanding how these work will serve as a good foundation for digging into the rest of this amazing machine. Don’t stop here though! Please continue to find that 15th feature and more that you enjoy and that helps you express your creativity.
Chris Sereno
Creator of keyboarding.church
I have been playing piano for almost 30 years and have 20 years behind keyboards. I was classically trained through high school and have continued learning through various alternative methods. I have also always loved technology, so I merged my passions and applied the combined skills into keyboarding. The majority of my playing has been dedicated to the church, and my wife (vocals) and I are currently serving at Northwoods Community Church. I created this site to share my knowledge and experience, equip others, and foster community among church pianists/keyboardists. More about me…